Improve site coordination in ArcGIS GeoBIM by applying unique symbols to Notes
Operations on AEC projects can become very complex. It is essential for the entire project ecosystem to always be aware of key locations. These can range from information points, safety equipment, dangers, and ongoing work areas to name a few. In ArcGIS GeoBIM, the Editor tool allows you to display these key features within the context of your site through Note layers.
The volume of points of interest within active sites can create confusion, especially if there is no distinct difference in their symbology. In the latest release of ArcGIS GeoBIM, you can create your own list of values for Note labels. This allows you to proactively prepare a library of commonly required Location, Line, and Area Notes. Each value in this list can then be given a distinct symbology, providing you with better visualization of your project. This new feature will only apply to projects created after the June 2023 release of ArcGIS GeoBIM.
Apply Custom Symbology
To apply a custom symbology to your Notes layers, complete the following steps:
Create an ArcGIS GeoBIM project and app. To learn the setup process, see the following:
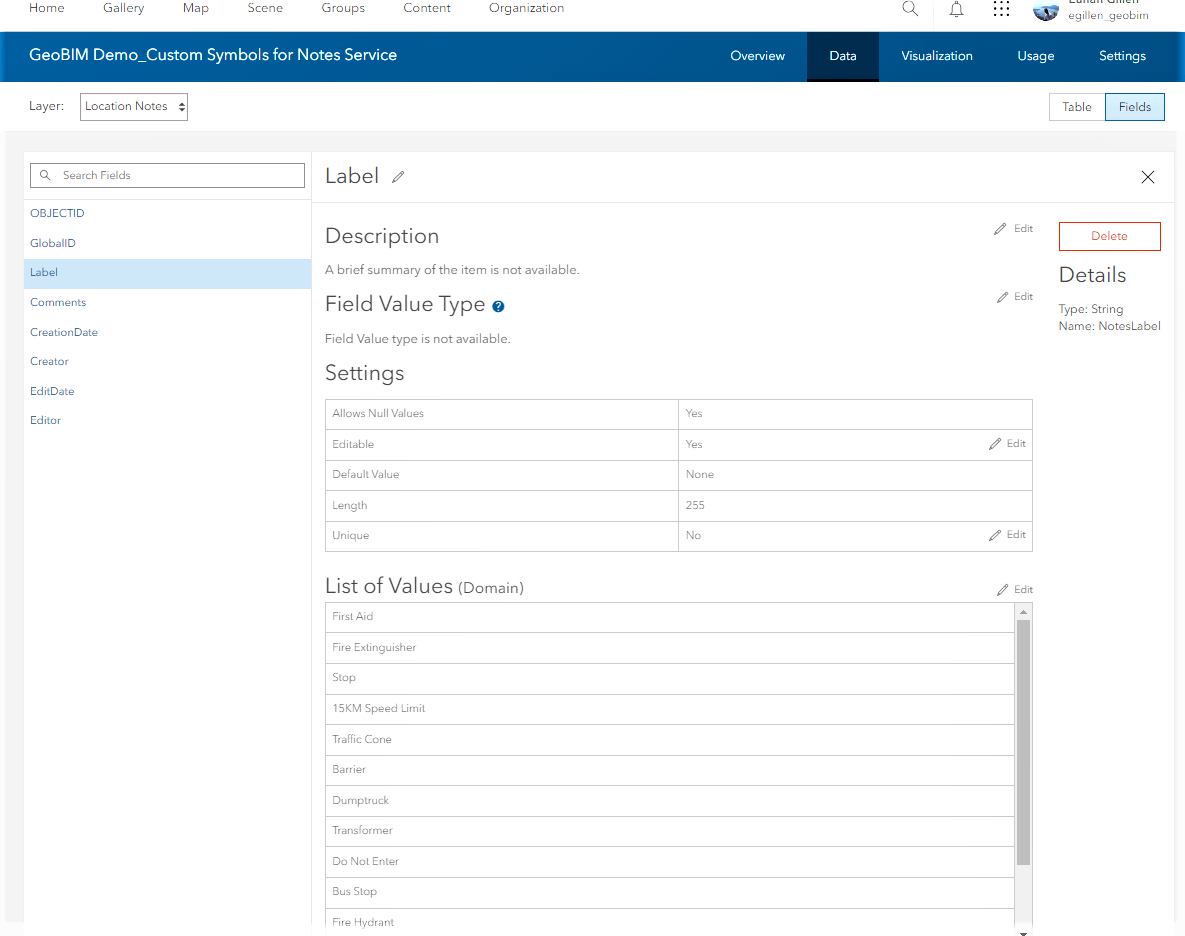
Using the feature service created during your GeoBIM project setup, create lists of values for your Label fields within your Note layers (Figure 1). Select the following link to learn the workflow of creating a list of values in ArcGIS Online:
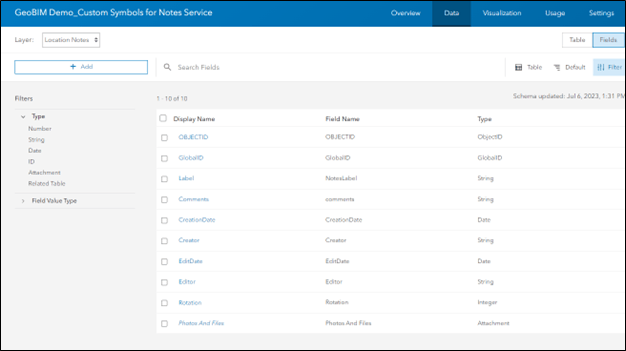
Add a numeric data type field to your Notes layers (Figure 2). This will allow for the rotation of your symbols later.
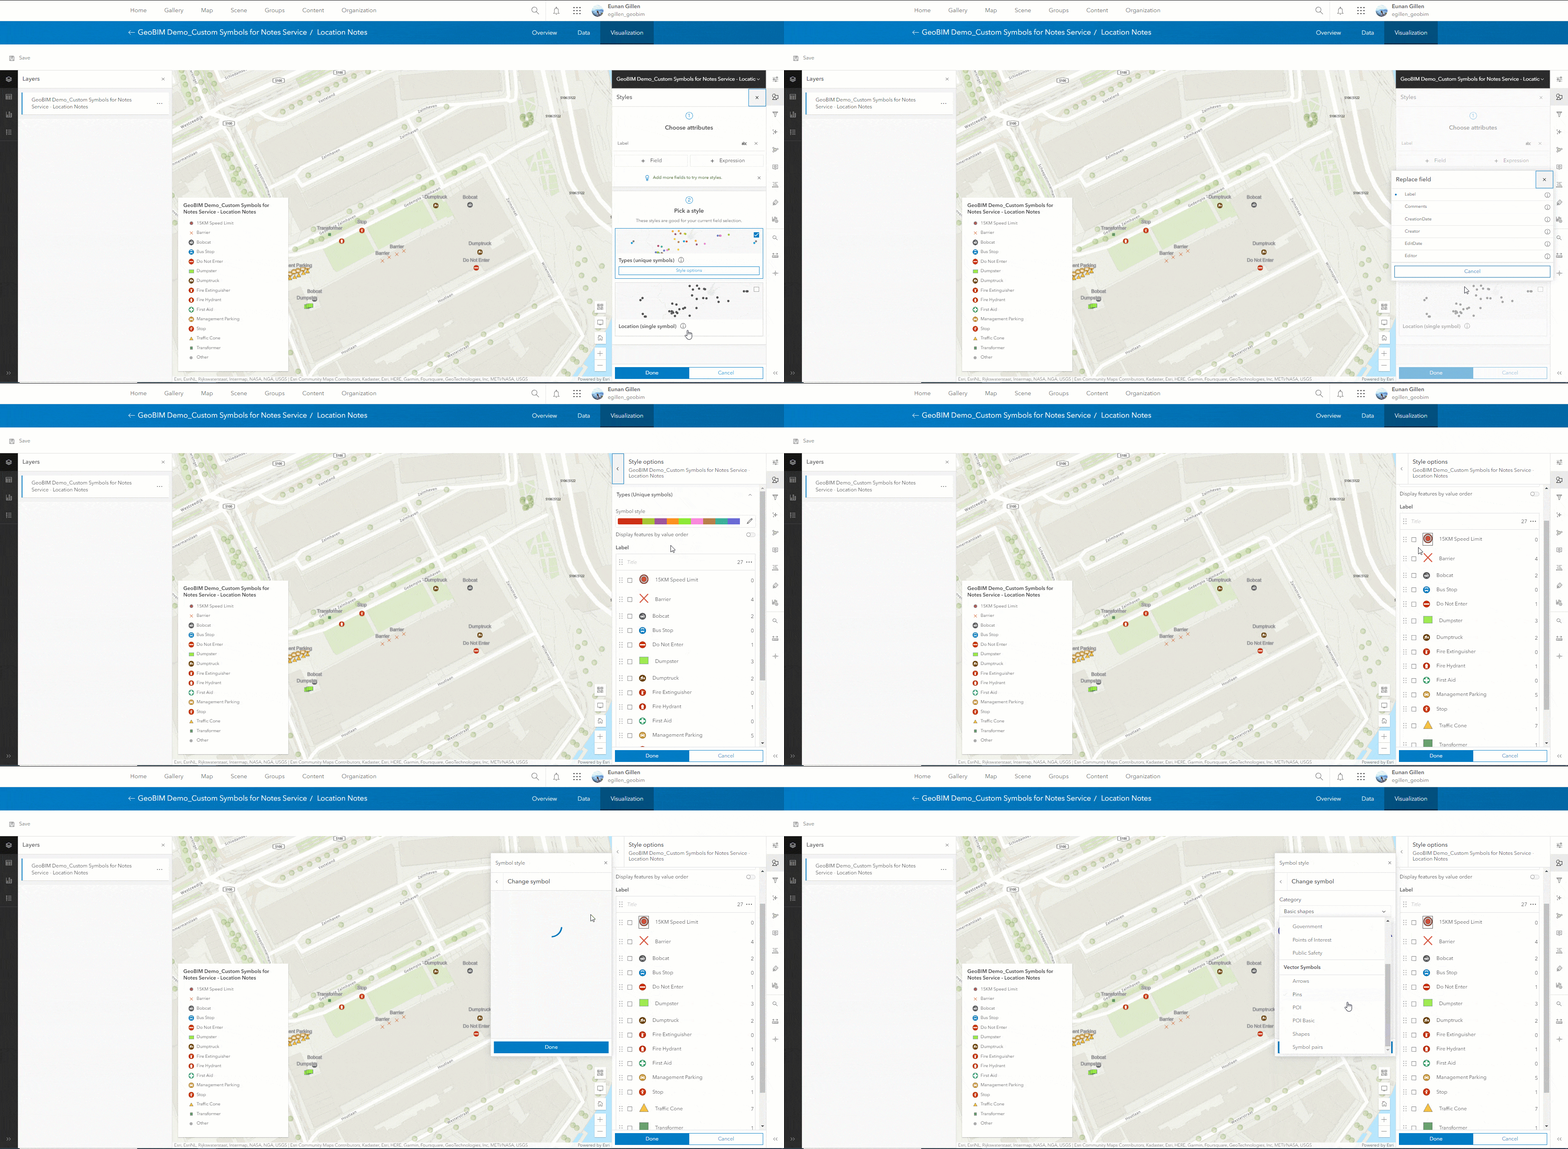
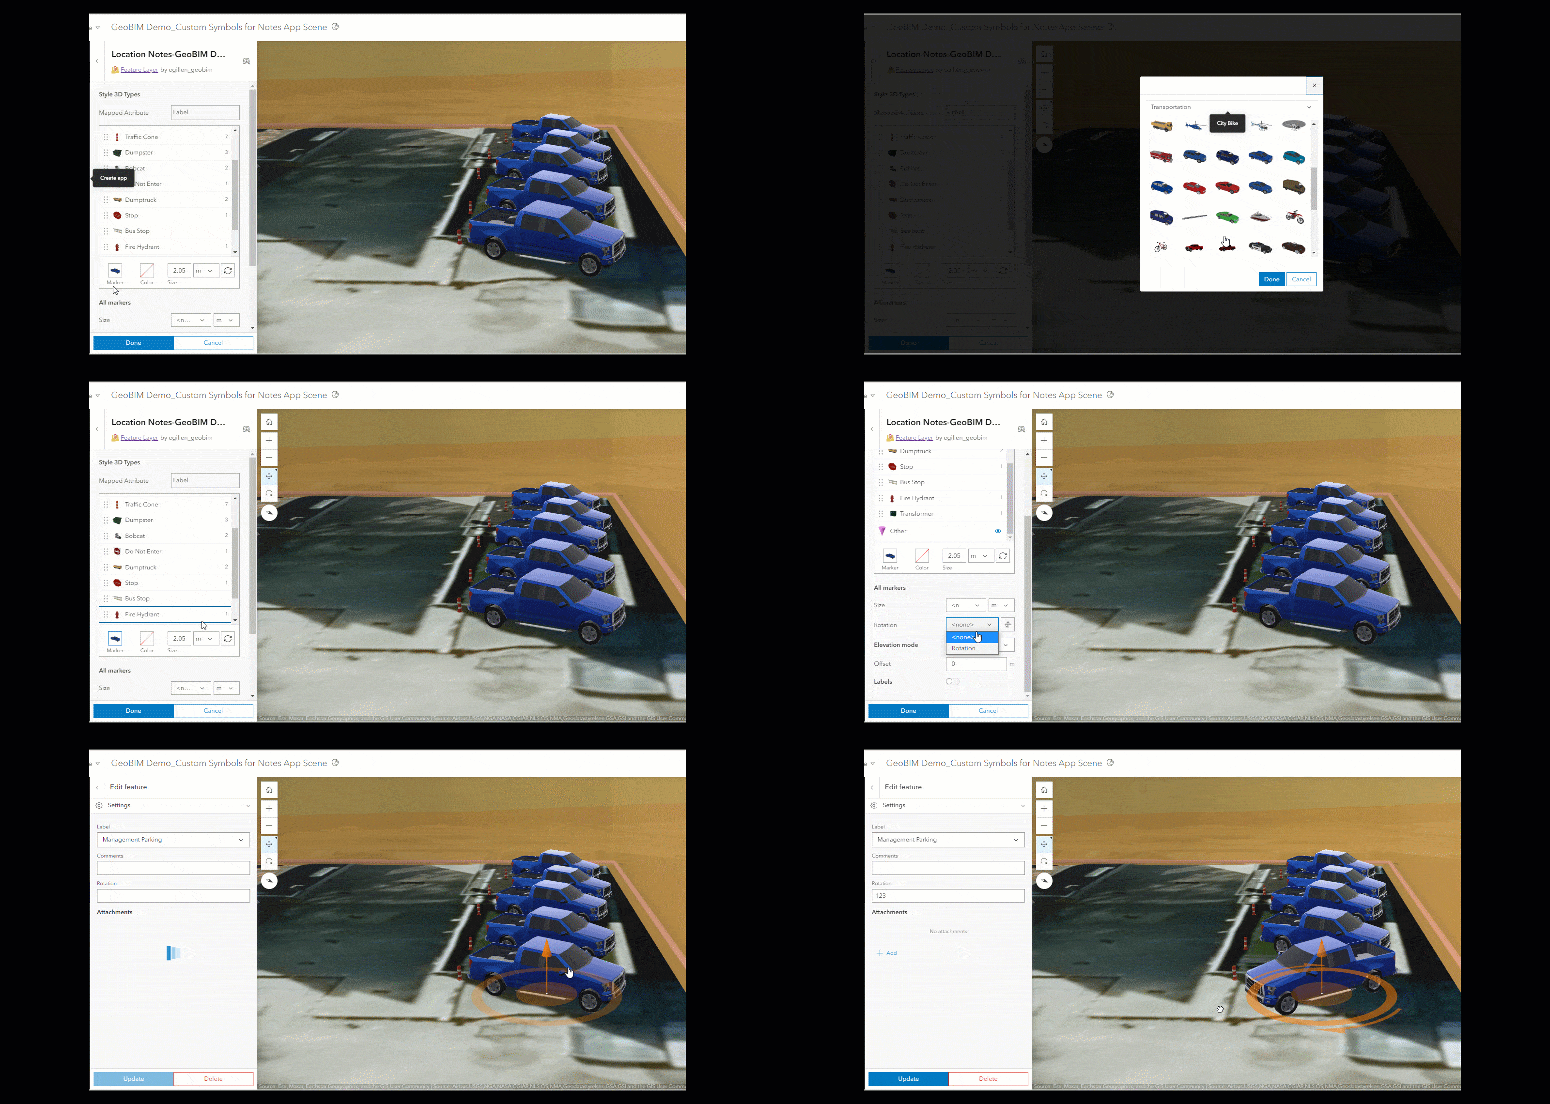
Add symbology relevant to your Label fields. Follow the animation below to see an example of adding Custom Symbology to the Location Notes layer of the feature service.
For Location Notes, you can either use pre-existing built-in symbols or upload images as point symbols in Map Viewer.
Delete the Label class for the layer and add it back in again. This step is required as the “Code (stored value)” set for your list of values will initially display for Labels instead of “Label (displayed value)”. Adding a new Label class will allow the “Label (displayed value)” to show as the Label. It is a currently known limitation that the “Code (stored value)” field will always be set as the Label for Notes within Scenes.
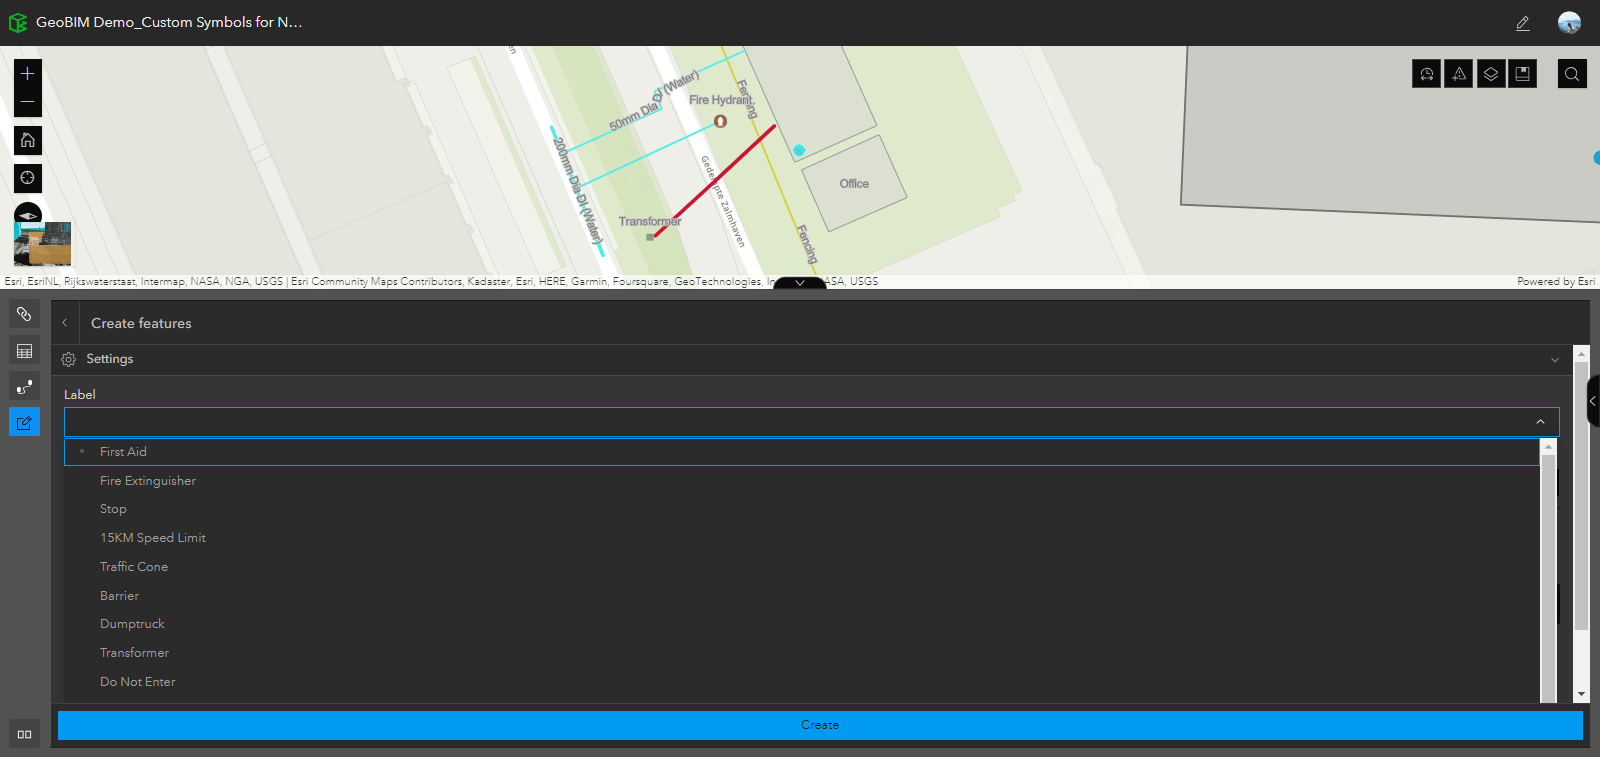
Return to ArcGIS GeoBIM, and in your Viewer App, start adding Notes to your project. Choose values from the drop-down list (Figure 3). Your Notes will come into the Map View with the symbology set in ArcGIS Online. Now Notes have a distinct symbology; you may want to turn off the Label in Map View.
In ArcGIS Online, open the scene from your ArcGIS GeoBIM project in Scene Viewer. The Location Notes created previously are now visible in Scene Viewer, however, all the symbology is set to default. Edit symbology as desired and move the new Note labels above the Other field to include them in the View.
To add a rotation field to your Notes simply select the numeric data type field you created earlier in the drop-down menu next to Rotation.
Line Notes are limited to one profile in scenes, however, you can make a Layer View of the original feature service and add it to your scene if you need multiple Line profiles (Wall, Tube, Strip, Square) for your project.
If you want to add multiple Line Note profiles, follow these steps:
- Create a hosted feature layer view of the feature service being used on ArcGIS GeoBIM.
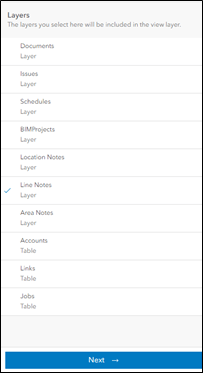
- Only add the necessary layers to the Layer View (Figure 4).
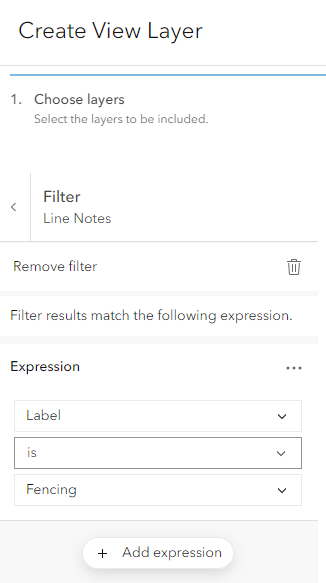
- Add filter expressions to ensure that only the desired fields of the Layer View are shown in the Map View (Figure 5).
Open your scene in Scene Viewer and add the Layer View created in the last step to the contents. The Layer View will only contain the layers and expressions set during its creation. Open the Layer View in the Layer Manager and set the custom symbology.
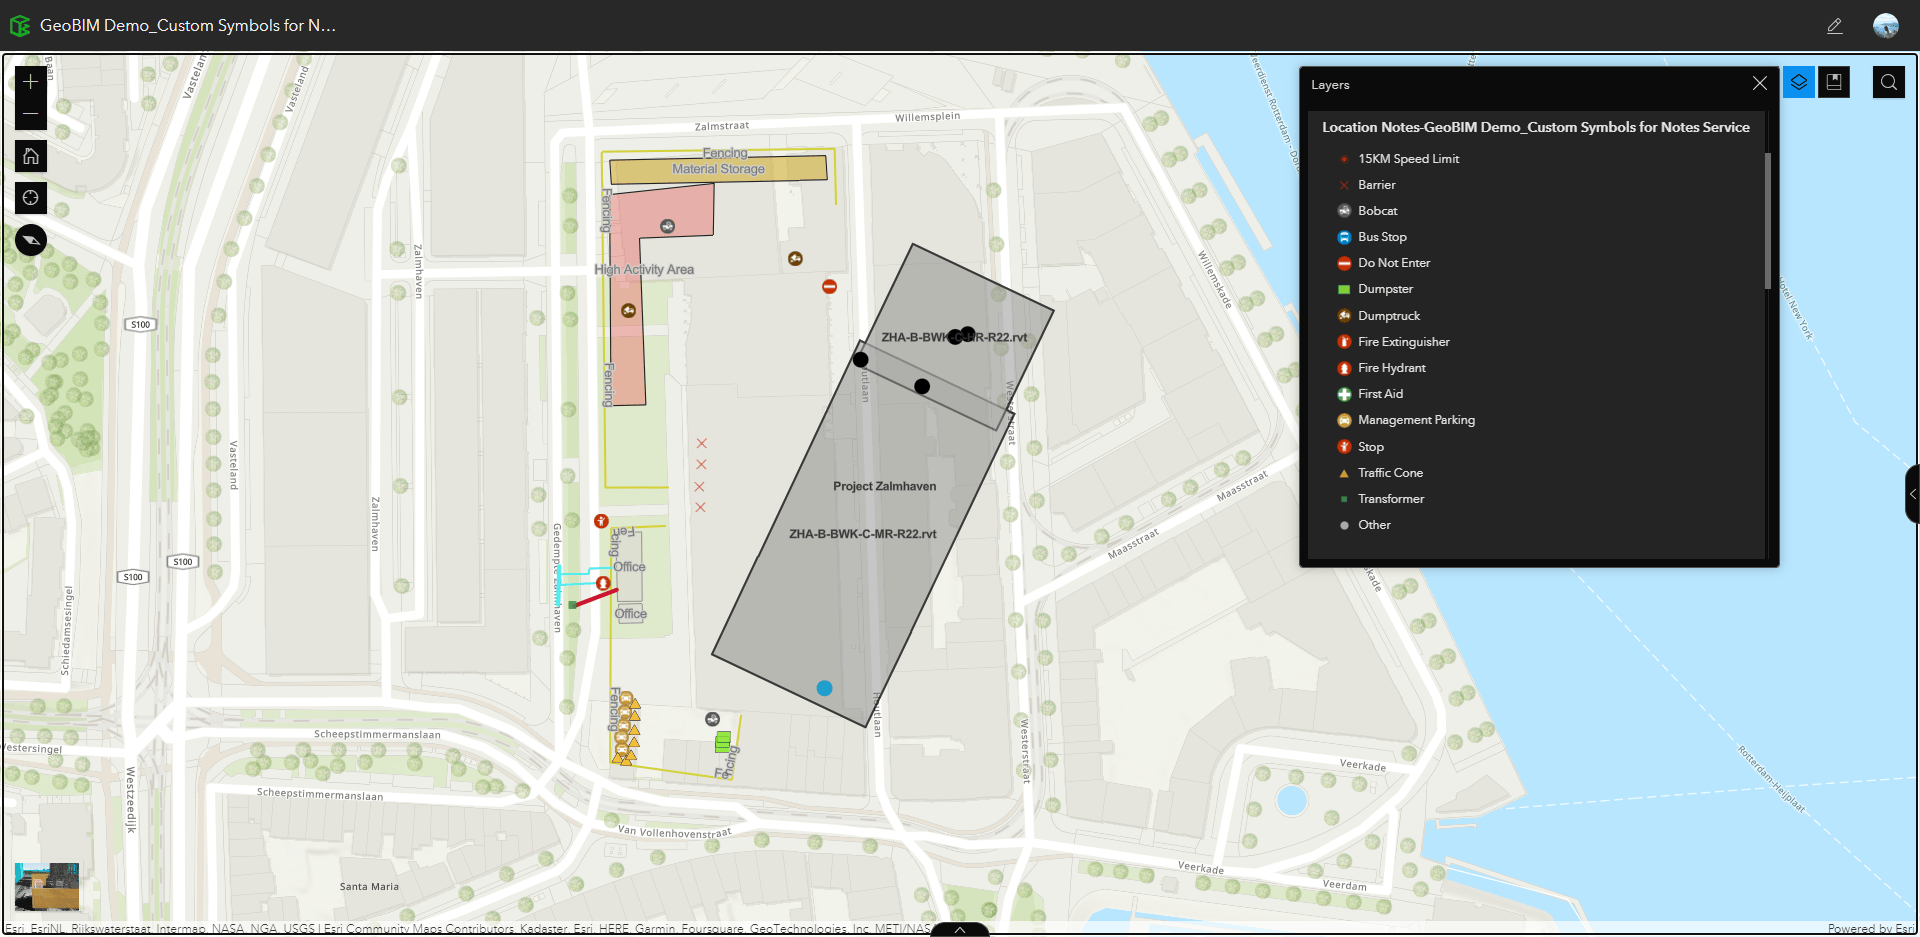
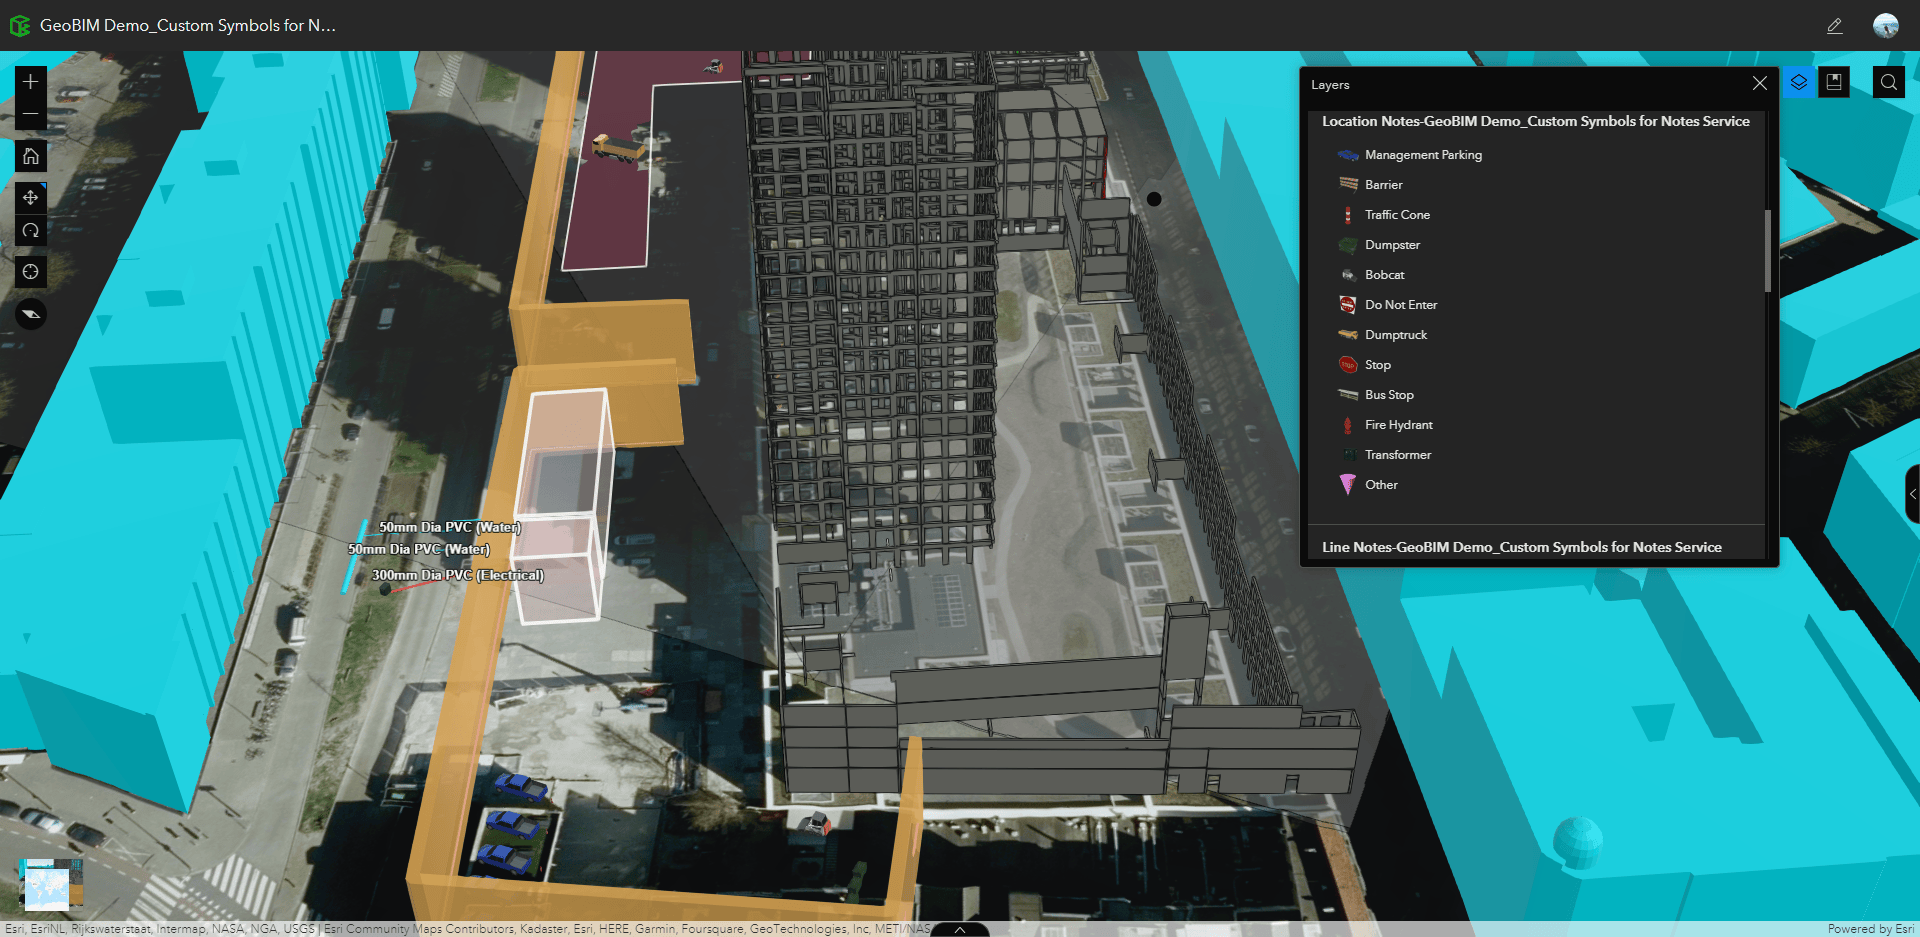
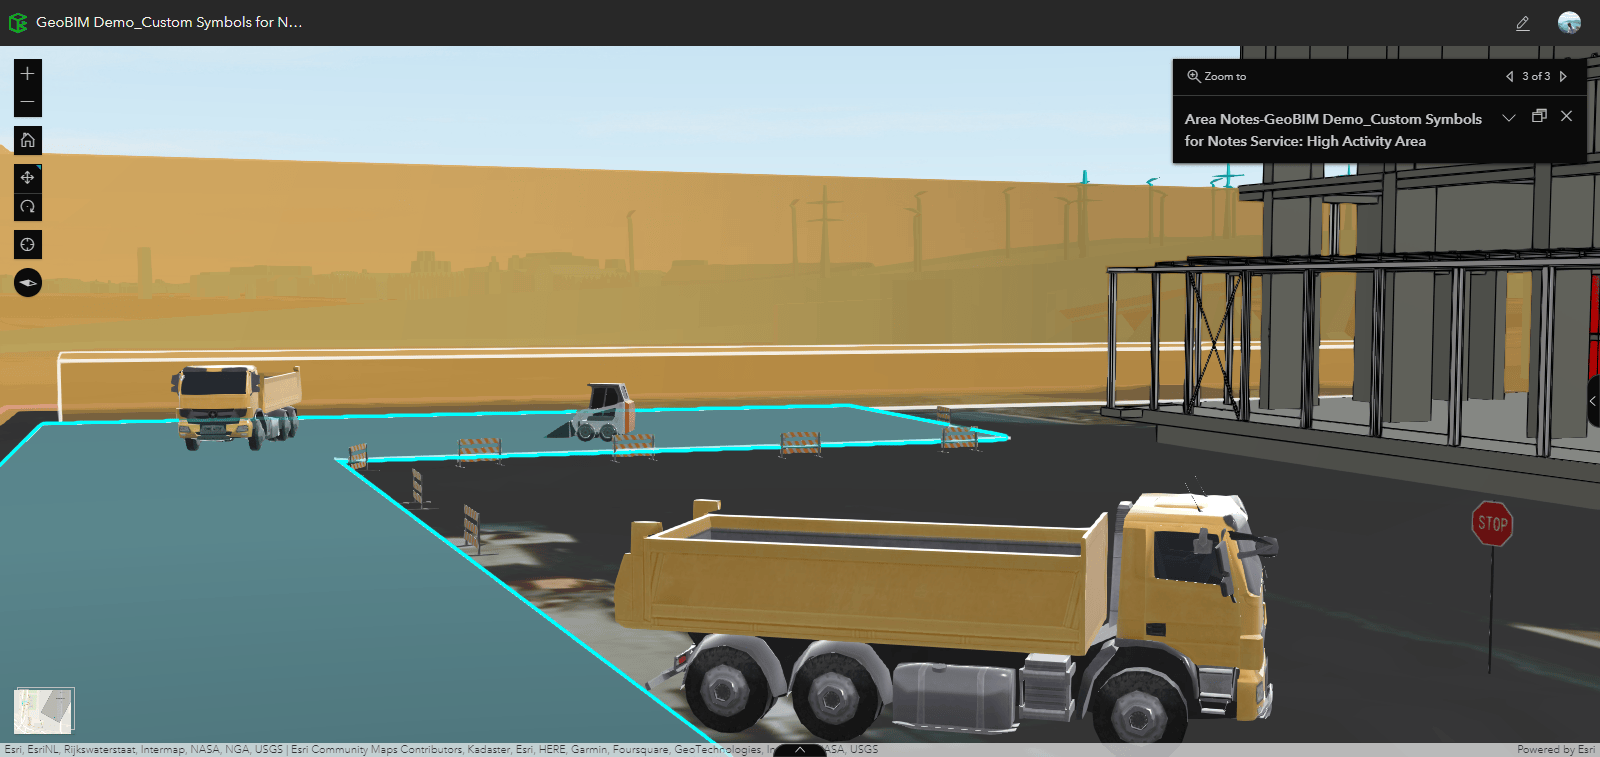
As a result of following these steps, you will have a more visually aesthetic view of your project that is easy to digest and manoeuvre around (Figures 6 through 8).
Known Limitations:
- Scene Viewer will not recognize a preset list of values until they have been added as a feature in a map.
- The ArcGIS GeoBIM App may sometimes need to be refreshed after adding a Note. This allows the scene view to load with the new Note feature.
- Labels for Notes in scene views will take on the coded value set for your list of values on ArcGIS Online.

